Completely Configure Your Outlook.com Account in iOS

Outlook Logo

Outlook Logo

I recently reviewed Microsoft’s guidance for getting your Outlook.com (aka, Hotmail and Windows Live) email account. While they represent a good start, the instructions will likely leave you with some odd behavior. Granted that Apple is probably more to blame than Microsoft, I’d like to round out the instructions so you’ll have a better experience.

Here’s Microsoft’s advice:

iPhone, iPad, or iPod Touch

  1. Tap Settings, and then tap Mail, Contacts, Calendar.
  2. Tap Add Account in the Accounts page.
  3. Select Hotmail.
  4. Enter your Outlook.com address and password.
  5. Select the fields that you want to sync. Tap Save.

Here’s the rest:

Outlook.com Configuration


  1. Return to your Outlook/Hotmail account settings (see Figure 1).
  2. Decide which services you’d like to sync with your iOS device (Mail, Contacts, Calendars, Reminders).
  3. Tap Account.
  4. In the Description field, you can enter a name for the account. It can be anything. Keep it simple, though. “Outlook.com” or “Hotmail” or something else meaningful to you.
  5. Tap Advanced.
  6. Choose whether you want discarded messages to be deleted or archived.
  7. Tap Account in the upper left.
  8. Tap Done.
  9. Tap Mail Days to Sync.
  10. Decide how far back you wish to sync your messages. I chose No Limit, but you might have a compelling reason not to do this. If you limit the time, you might only see some messages on your iOS device. Then when you log in from a Web browser, you’ll see many more messages. This confused me the first time it happened.

Hope this helps!

Use iCloud for Your Mobile, Mac, and even Windows

iOS Icons for Contacts and Calendars

iOS Icons for Contacts and Calendars


There are advantages to using Apple’s iCloud especially when you own an iPhone and a Mac. But even a Windows user will find compelling features.

Contacts

When you use iCloud Contacts, you can assign a relationship to each contact. This allows you to tell Siri “Call my wife on her iPhone.” Siri can find the contact quickly and connect the call for you.

Calendars

When you use iCloud Calendar, your events gain deeper integration into the iPhone. If you share iCloud-based calendars with others, you can be notified of any changes to those calendars in Notification Center and within the iOS Calendar app’s Inbox feature. And when you change an event, subscribers to your calendar are notified.

Macs

The Contacts and Calendar app in OS X can be connected to an iCloud account. When they’re connected, they synchronize with your iOS devices, Macs, and iCloud.com (more on that below).

In addition to simple synchronization, you can use these OS X apps to backup and export the data in your Contacts and Calendar app. Conversely, they can also be used to import data into iCloud. This is handy if you decide to migrate to iCloud and wish to bring your historical data (say from Google Calendar) with you.

iCloud.com

The Contacts and Calendar apps in iCloud.com are updated in real-time to and from your iOS devices and Macs. Changes and additions made at the Web site are immediately pushed to all your devices and, in the case of calendars, to those who subscribe.

You can also create and share your calendars with others (or even make it public) via iCloud.com.

The Web site is also helpful for Windows users. A Windows-based PC or tablet can access iCoud.com to manage your information and events, and those changes will be almost immediately pushed to your iOS devices (iPod touch, iPad, iPhone).

My Story 

When I first adopted the iPhone (remember the 3GS?), my wife and I were using Google for contacts and calendars. When Siri was introduced with the iPhone 4S, we wanted to use role names (husband, wife, mom, dad, etc.) to invoke calls. So we moved to iCloud Contacts to allow for that. That led to me logging into iCloud.com to view and edit contacts periodically, so the thought of moving our calendars to iCloud started to sound appealing. After some investigation and a test, I exported all our calendar data from Google and took the plunge. I used our MacBook Air’s Calendar app to import our Google data. And it moved over without a problem. The only odd thing I noticed was that the times from our Google events were imported as UTC (Universal Time). No big deal, though. A 3:00 PM ET event came in as 3:00 PM UTC, and since we’re not liable to create alarms on these past events, this is not a problem.

Something to consider. Hope this helps anyone agonizing over the thought of migrating to iCloud services.

Apple TV Tips

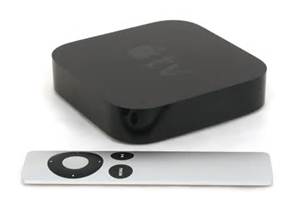
Apple TV RemoteSteve Jobs once described the Apple TV as a hobby. Hobby or not, it’s fairly popular. But it isn’t covered as fully as iPhones and iPads. If you have one, here are a handful of tips that might make living with an Apple TV a little easier.

Rearrange the onscreen icons. Move the selection to the icon you’d like to move, then press and hold the center selection button until the icons start their infamous jiggling. Direct the icon to is new location and press that center selection button again.

Hide onscreen icons. Within Settings, go to General, then Parental Control. In the list of apps, toggle between Show and Hide.

Get Video Info and Audio Options. During video playback, press and hold the Up button. A bar will appear with information about the currently playing video will appear. While this info bar is on the screen, press and hold the center selection button. Audio options including Closed Captioning will appear.

Return to the Main Menu Quickly. If you’re several levels deep within an app or Settings and you just want to get back to the main menu (aka, Home screen), then press and hold the Menu button.

Use the Remote App. If you have an iOS mobile device, consider downloading Apple’s Remote app. You can control your Apple TV when your mobile device is attached to the same network. More importantly, you can use that devices keyboard to make it easier to type in a search query.

Put Your Apple TV to Sleep. On the main menu, press and hold the Play/Pause button.